How to Collect and Submit Plant Samples for Accurate Disease Diagnosis
Published 2026-11-18
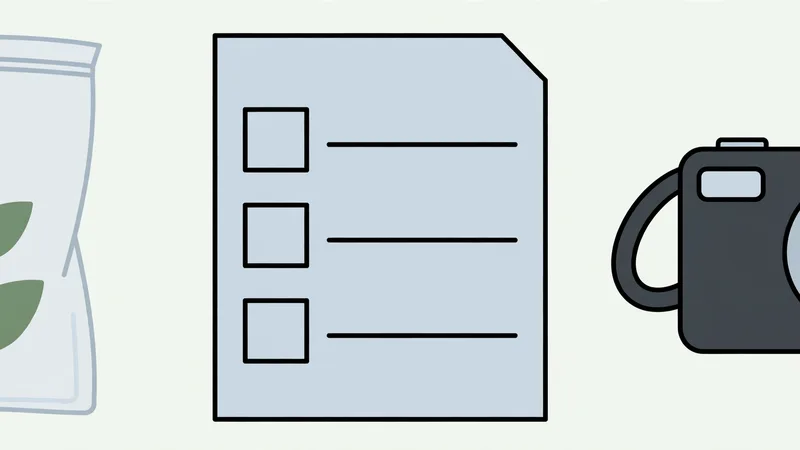
A good sample is essential for an accurate diagnosis — that is the first line of NC State Extension's submission guide, and every state diagnostic clinic says the same thing in its own words. The accuracy of a diagnosis is directly related to the quality of the sample, so a few minutes of careful collecting decides whether the lab can answer your question at all. The rules are simple: collect fresh specimens showing a range of symptom stages, keep them dry, include the right plant parts for the symptom type, pack them so they arrive intact, ship early in the week, and fill in the submission form completely. Do that, and the lab can usually identify the cause; skip it, and the most common lab reply is that the sample was too dead, too dry, too wet, or too little to diagnose.
How to collect and submit a plant sample for diagnosis
Before you collect: photos, notes and timing
Photograph the problem before you touch it. Take a wide shot of the planting showing the pattern, a shot of the whole affected plant, and close-ups of the symptoms on the top and underside of leaves — the diagnostic clinic will use the pattern as much as the sample. Note when the symptoms first appeared, how fast they are spreading, which varieties are affected, and what has changed recently: irrigation, fertiliser, sprays, weather, new plants brought in. Collect the sample the same day you decide to send it, and plan to ship it early in the week — Monday or Tuesday — so it does not sit in a warehouse over the weekend and rot. If shipping must wait, keep the sample cool, preferably refrigerated, and out of the sun. Collect before you spray if you possibly can: the University of Maryland's lab warns that once pesticides have been applied it may be difficult to obtain an accurate diagnosis. And contact the clinic first if you are unsure what to send — a short call or email saves a wasted shipment, and most clinics publish their forms and fees on their websites.
The five universal rules
First, fresh only. Submit only freshly collected specimens. Tissue that is completely dead or dried out is usually colonised by secondary organisms that interfere with detecting the original pathogen, so the lab cannot tell what started the problem. Second, a range of stages. Collect several specimens showing the progression of symptoms, from early to advanced — and, where the instructions call for it, include some healthy tissue alongside the diseased tissue, because the transition zone between living and dead tissue is where the pathogen is most active. Third, the right part for the symptom. Leaf spots need leaves; wilts need whole plants with roots; cankers need stem sections; fruit rots need fruit. Fourth, dry. Never add water or wet paper towels to the bag — every clinic repeats this, because extra moisture speeds decay and the sample arrives as mush. Fifth, label everything. Each sample in its own bag, clearly labelled with the plant, the date and the location, and a completed submission form to go with it.
By symptom type: what to send
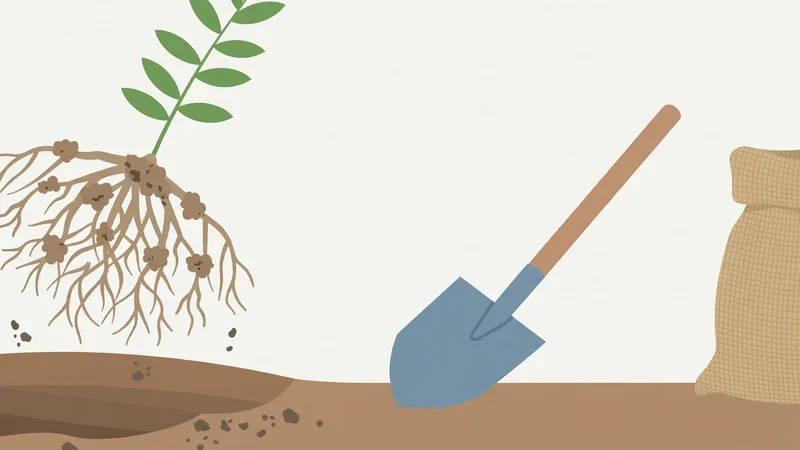
For leaf spots, collect leaves showing all stages of infection, with twigs or branches still attached where possible, and keep compound leaves intact with leaflets on their petioles. Place leaves, dried of excess moisture, between dry paper towels and then in a resealable plastic bag. For wilts, yellowing, stunting or general decline, send the whole plant including the root system. Dig the plant carefully so as to disturb the roots as little as possible — do not pull it out of the ground — shake away excess soil, and do not wash the soil from the roots. Enclose the root system in a plastic bag sealed at the base of the stem, then enclose the whole plant in another plastic bag. For root and soil problems in a plant too large to send whole, collect a generous handful of fine roots plus about a quart of soil from the root zone, in a sealed plastic bag. For cankers and galls, send a branch section that includes the transition zone where dead bark stops and live tissue begins — entirely dead wood is not diagnostically useful. For fruit and fleshy organs, pack ripe fruit in absorbent material (paper, not plastic alone) so it does not turn to liquid in transit. For lawn and turf diseases, take a 3 to 4 inch diameter plug, 2 to 3 inches deep, from where healthy and diseased turf meet, including roots and soil. For trees and shrubs, send several branches showing different stages of decline in a separate closed bag, plus roots and soil if a below-ground problem is suspected.
Packing and shipping step by step
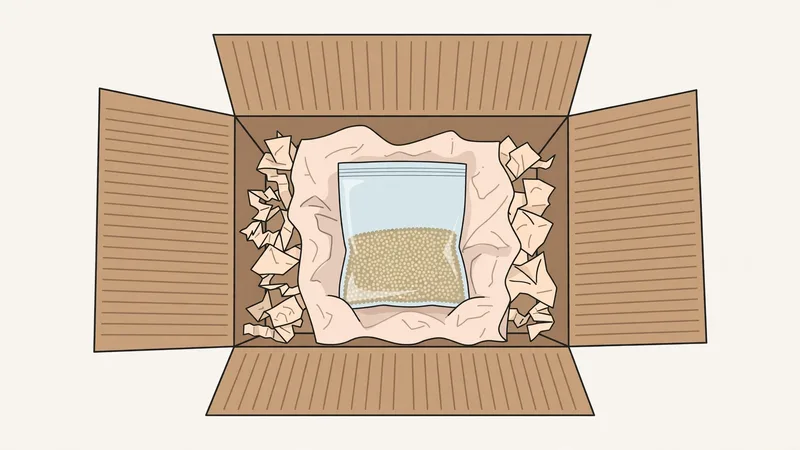
Dry any excess moisture from the tissue and wrap the sample in dry paper towels, replacing them if they absorb moisture. Enclose each sample in its own resealable plastic bag, labelled. For out-of-state samples, Mississippi State notes that samples must be packaged in two sealed plastic bags — check your clinic's rules, because some states have additional requirements. Place the bagged sample in a crush-proof box with newspaper or other cushioning so it is not crushed in transit, and include the completed submission form inside the box (or submit the digital form where the clinic prefers it). Ship by overnight or second-day carrier early in the week, and mark the package so it is handled promptly. Do not mail samples at the end of the week — Maryland's instructions are blunt about why: they may not be delivered and will deteriorate over the weekend. Keep the tracking number, and tell the clinic the sample is coming if their instructions ask for that.
The submission form: what to write and why it matters
The form is half the diagnosis. Mississippi State puts it well: the extra five or ten minutes it takes to fill out the form could save the lab an hour or more of barking up the wrong tree. Include the plant's identity (common and scientific name if you know it, and the variety), the plant's age or planting date, when symptoms were first observed, which parts are affected, how the problem is distributed in the planting, the site history (has this disease been a problem here before?), cultural practices (irrigation, fertiliser, spacing), and every chemical applied, with dates. Add the photos you took. The more information you provide, the easier it is for the diagnosticians to make an accurate diagnosis — and the less likely they are to spend their time testing for a cause your notes would have ruled out in a minute. If you do not know something, say so; a blank is better than a guess.
What happens at the lab, and what a result can and cannot say
At the lab, a diagnostician examines the sample, looks for signs under the microscope, and may culture the pathogen, run a serological or molecular test, or incubate the tissue to encourage sporulation. Some samples need further testing for an accurate diagnosis, and some need a specialist — a virus, a nematode or a bacterial problem may go to a different bench. Turnaround varies by clinic and by test: the University of Maryland's lab reports an average turnaround of about two weeks, and other clinics give similar ranges — do not expect a same-day answer, and do not expect a lab to name a variety or a spray for you. A lab result can identify the pathogen and often the conditions that favoured it; it cannot tell you exactly what to spray without the label, and it cannot resurrect a plant that is already dead. Fees vary by state and by test, and out-of-state samples often cost more — check the clinic's current fee schedule before you ship, rather than assuming a price from this article.
Mistakes that waste a sample
The most common mistake is sending dead material: a plant that has been dead for a week is a compost heap of secondary fungi, not a diagnostic sample. The second is sending only healthy tissue, or only the worst leaf — the lab needs the range, especially the transition zone. The third is adding water or wet paper towels, which rots the sample in the bag. The fourth is shipping late in the week so the sample spends the weekend in a hot warehouse. The fifth is sending one leaf when the problem is a wilt — the lab needs the roots. The sixth is a blank form: a sample with no history is a puzzle with half the pieces missing. Avoid those six, and a clinic can usually give you a useful answer.
What to do next
Photograph the problem today, collect a fresh sample showing several stages of symptoms, keep it dry and cool, fill in the form completely, and ship it early next week in a crush-proof box. While it travels, run a photo check on PhytoAssist for a working shortlist — and do not spray for a named disease until the lab confirms it.
Get a photo opinion first
Photograph the symptoms before you collect the sample — a photo check can narrow the shortlist while the sample is on its way to the lab.
Advisory note
This article is advisory guidance, not a definitive diagnosis. A photo-based check can narrow down the likely disease, but only laboratory confirmation or an extension officer's field visit gives a certain diagnosis. Never spray on the basis of a blog post alone — check the current product label and your local agriculture department advice first. No pesticide doses are given in this article.
By Ghulam Mustafa — Final-year BSc (Hons.) Agriculture student, specialising in Plant Pathology, The Islamia University of Bahawalpur (IUB), Pakistan. CGPA 3.98/4.00.
Frequently asked questions
What makes a good plant sample?
A fresh specimen showing a range of symptom stages, with the right plant parts for the symptom (leaves for leaf spots, whole plant with roots for wilts), kept dry, labelled, and sent with a fully completed form and photos of the problem in the field.
Should I add water to keep the sample fresh?
No — never add water or wet paper towels. Extra moisture speeds decay, and the sample will arrive rotted. Keep it cool and refrigerated if shipping is delayed. A dry sample in a paper bag stays identifiable; a wet one arrives as mush that no lab can read.
Can I send a sample at the end of the week?
You can, but you should not. Samples mailed late in the week may sit undelivered over the weekend and deteriorate. Ship early in the week by overnight or second-day carrier. A sample that spends the weekend in a post box loses the signs the lab needs, so Monday shipping is worth the wait.
How long does a lab diagnosis take?
It varies by clinic and test. The University of Maryland's lab reports an average turnaround of about two weeks. Ask your clinic for its current turnaround when you submit. Complex tests take longer than a visual identification, so the clinic's estimate at submission is the one to plan around.
Do I need to send the whole plant?
For wilting, yellowing, stunting or general decline, yes — the whole plant including roots, dug carefully rather than pulled. For leaf spots, leaves at several stages with twigs attached are usually enough. Roots matter for wilts and declines, while leaf spots can usually be diagnosed from leaves at several stages.
Sources
- NC State Plant Disease and Insect Clinic — Submitting Samples From a Tree or Shrub in the Landscape (updated 27 February 2026) — consulted 2026-11-18
- University of Kentucky Extension — Submitting Plant Specimens for Disease Diagnosis (PPFS-GEN-09) — consulted 2026-11-18
- Mississippi State University Extension — How to Collect and Package Plant Disease Specimens for Diagnosis — consulted 2026-11-18
- University of Maryland Extension — Plant Diagnostic Laboratory submission forms and instructions — consulted 2026-11-18
- University of Arkansas Extension — How to submit a plant sample for diagnosis — consulted 2026-11-18
Continue: How to diagnose plant diseases from leaf symptoms · Can AI identify plant diseases from photos? · Early blight vs late blight in tomatoes